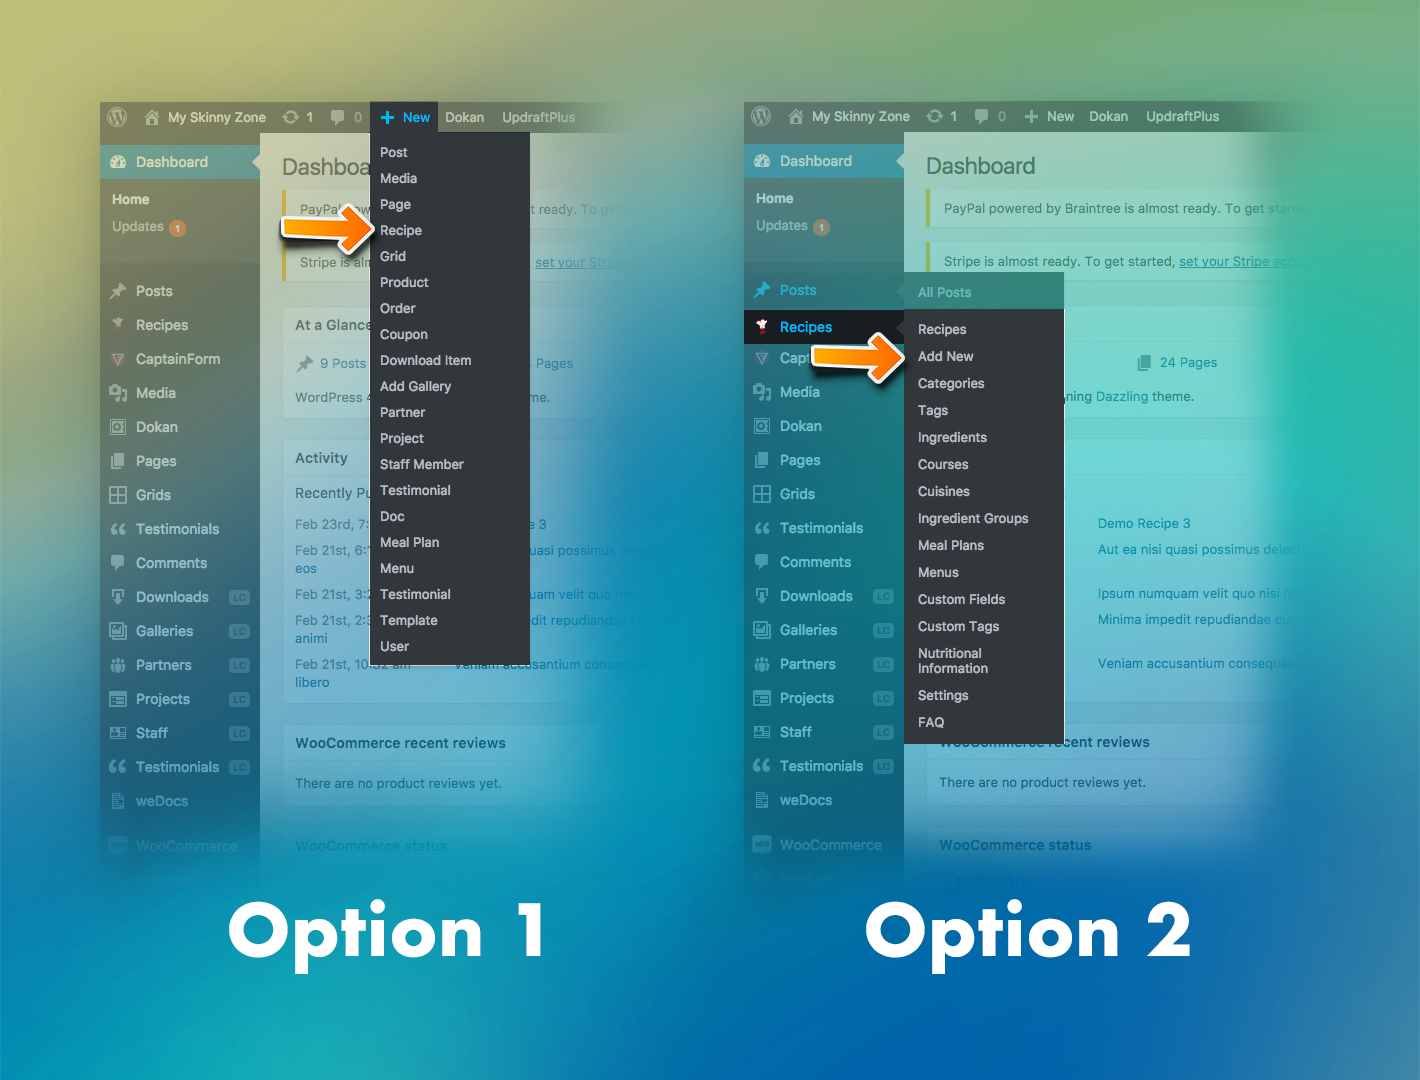
- Option 1
- Go to the TOP MENU | NEW -> RECIPE
- Option 2
- Go to the SIDE MENU | RECIPES -> ADD NEW
Using the OPTION 2 you can also see all your recipes (PRECIPES menus), check your categories (CATEGORIES) and check your tags (TAGS).
Some other options will be explained properly in each section.
INSERTING THE CONTENT
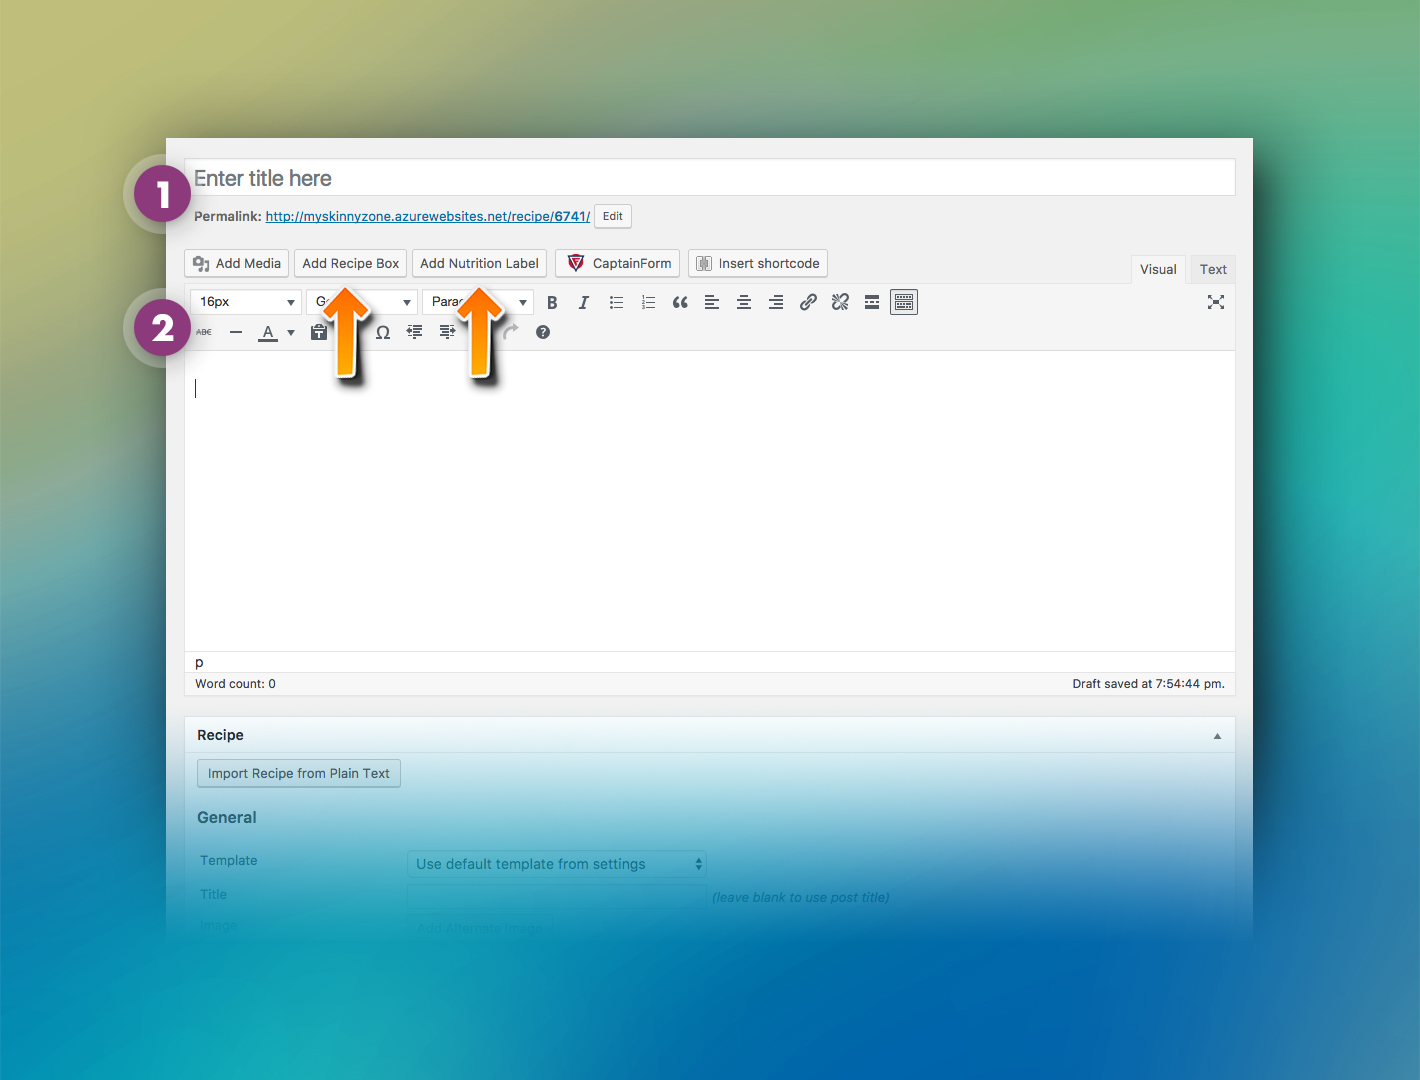
- 1 – The title of your recipe article.
Note that the final URL address for this article is made based on the name of the article.
After you put the name and start to put the content, the system will generate a URL address based on the name.
You can also edit this URL clicking in the button EDIT (this button is only enabled after you start to create the content).
- 2 – This is your editor. Here you will put all your content.
There are some simple text and media tools. Some special buttons are used to create specific contents, like recipes or forms.
Note there are some buttons that add differents contends. In a case of a recipe, you can add the recipe instructions and the nutrition label.- ADD RECIPE BOX: using this button you will be able to insert the entire structure of your recipe. Ingredients, step-by-step, instructions, and so on. Note when you click this button you will see only the tag [recipe]. This means a recipe will appear in this position when you publish your recipe. You can write a text and insert the recipe in the middle of this text using this button. (to insert the recipe information like ingredients, step-by-step and so on, check the instructions “Building the recipe” bellow)
- ADD NUTRITION LABEL: in the same mode, this button will add a tag. This mean, after published, this tag will be replaced by the nutritional information for this recipe. (to insert the nutritional information, check the instructions in the section Nutritional information)
BUILDING THE RECIPE
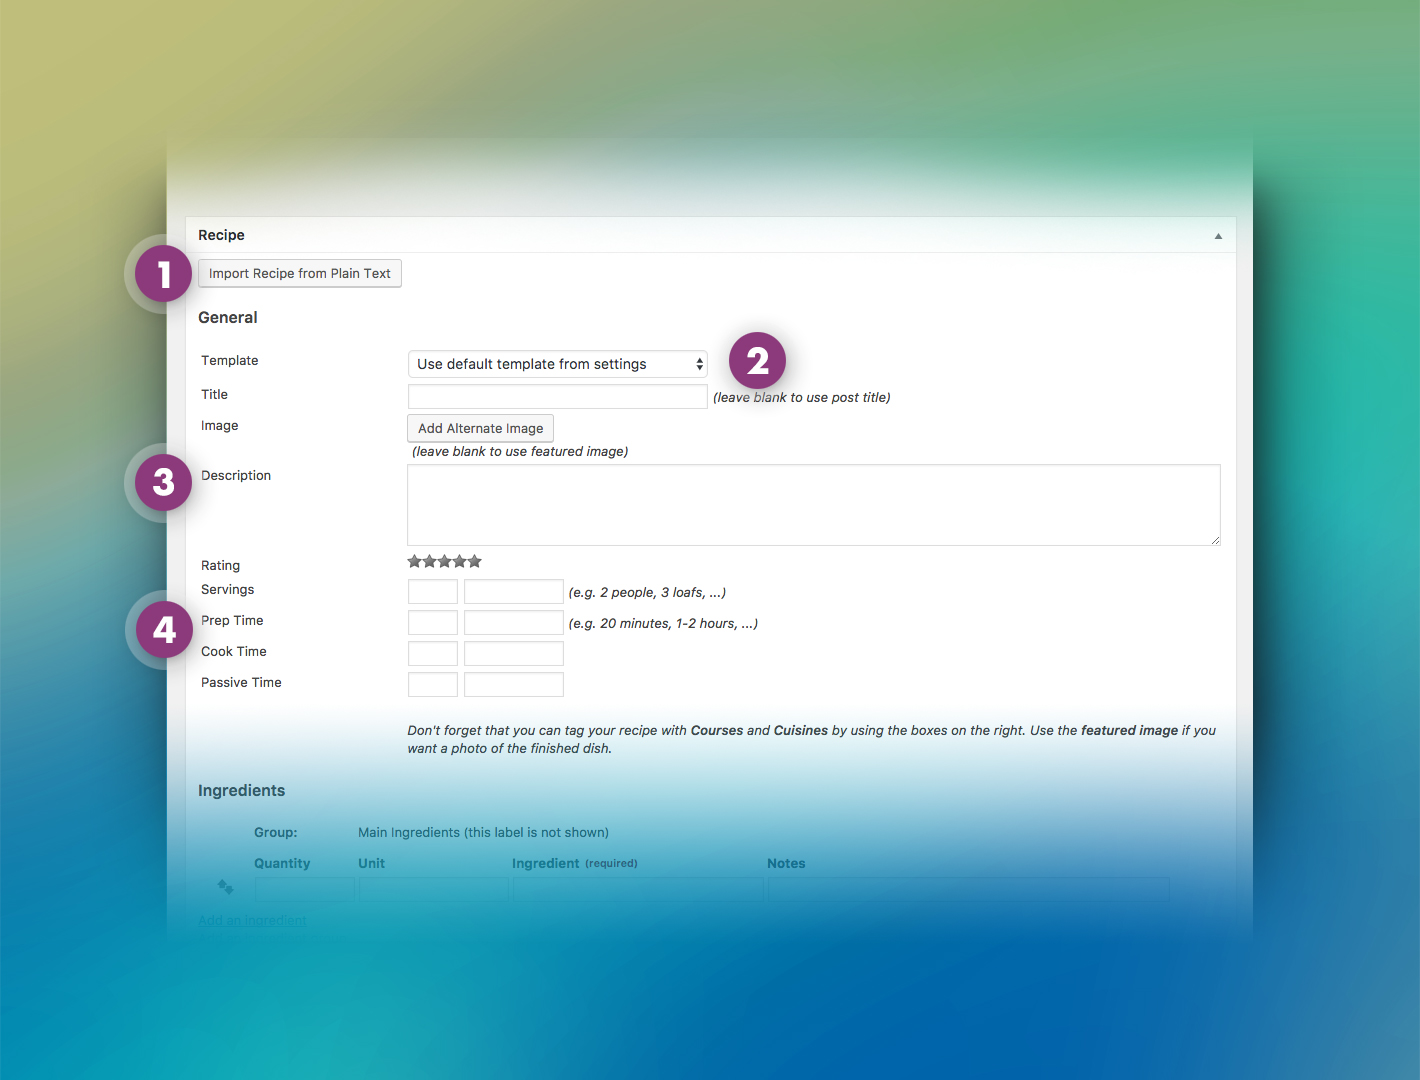
- 1 – Import your recipe from an external text.
You can use this option in case you already have the recipe in a text file. After importing you can customize and configure correctly each field.
- 2 – Appearance of your recipe.
There are some simple text and media tools. Some special buttons are used to create specific contents, like recipes or forms.
Note there are some buttons that add differents contends. In a case of a recipe, you can add the recipe instructions and the nutrition label.- TEMPLATE: here you can choose the style/appearance of your recipe.
- TITLE: this is the main title for your recipe. Note this title is different from the article title.
- IMAGE: here is where you can put a customized image the visitors will see. This image usually represents the recipe product, like a cake or the ingredients.
- 3 – The description of your recipe.
Here you can create a text about your recipe. This is not the field to describe how to make the recipe but to describe the recipe (in general).
- 4 – General information about your recipe.
Here you can provide some general information like time for preparation and so on. This is very important to give to the visitors an idea about the time/quantity.
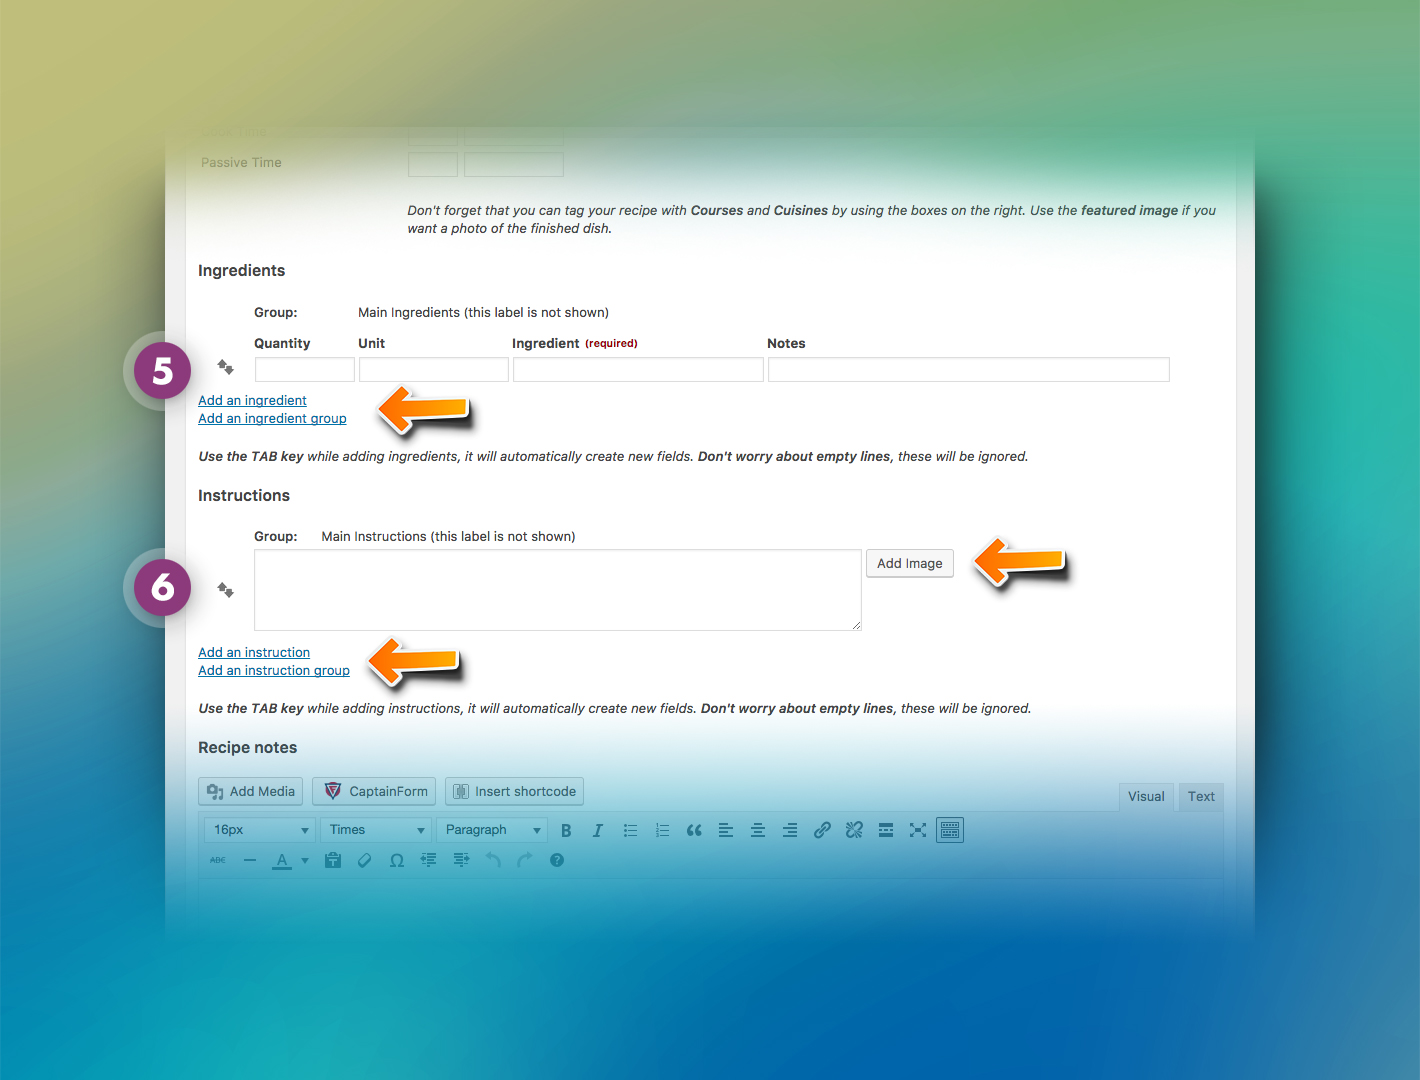
- 5 – Ingredients and groups.
These fields are used to insert each ingredient used in your recipe. The more information you give, better.
Also, you can create groups of ingredients to help the visitor understand better your recipe. For example, ingredients to use while hot and ingredients to use cold.
- 6 – Instructions and groups.
Here is where you describe the step-by-step of your recipe. You can also put images in each step to guide and show the results.
Similar to the ingredients groups, here you can also create instructions groups to organize better the instructions. For example, you can create a group to cake and another group to describe the instructions for the cake top.
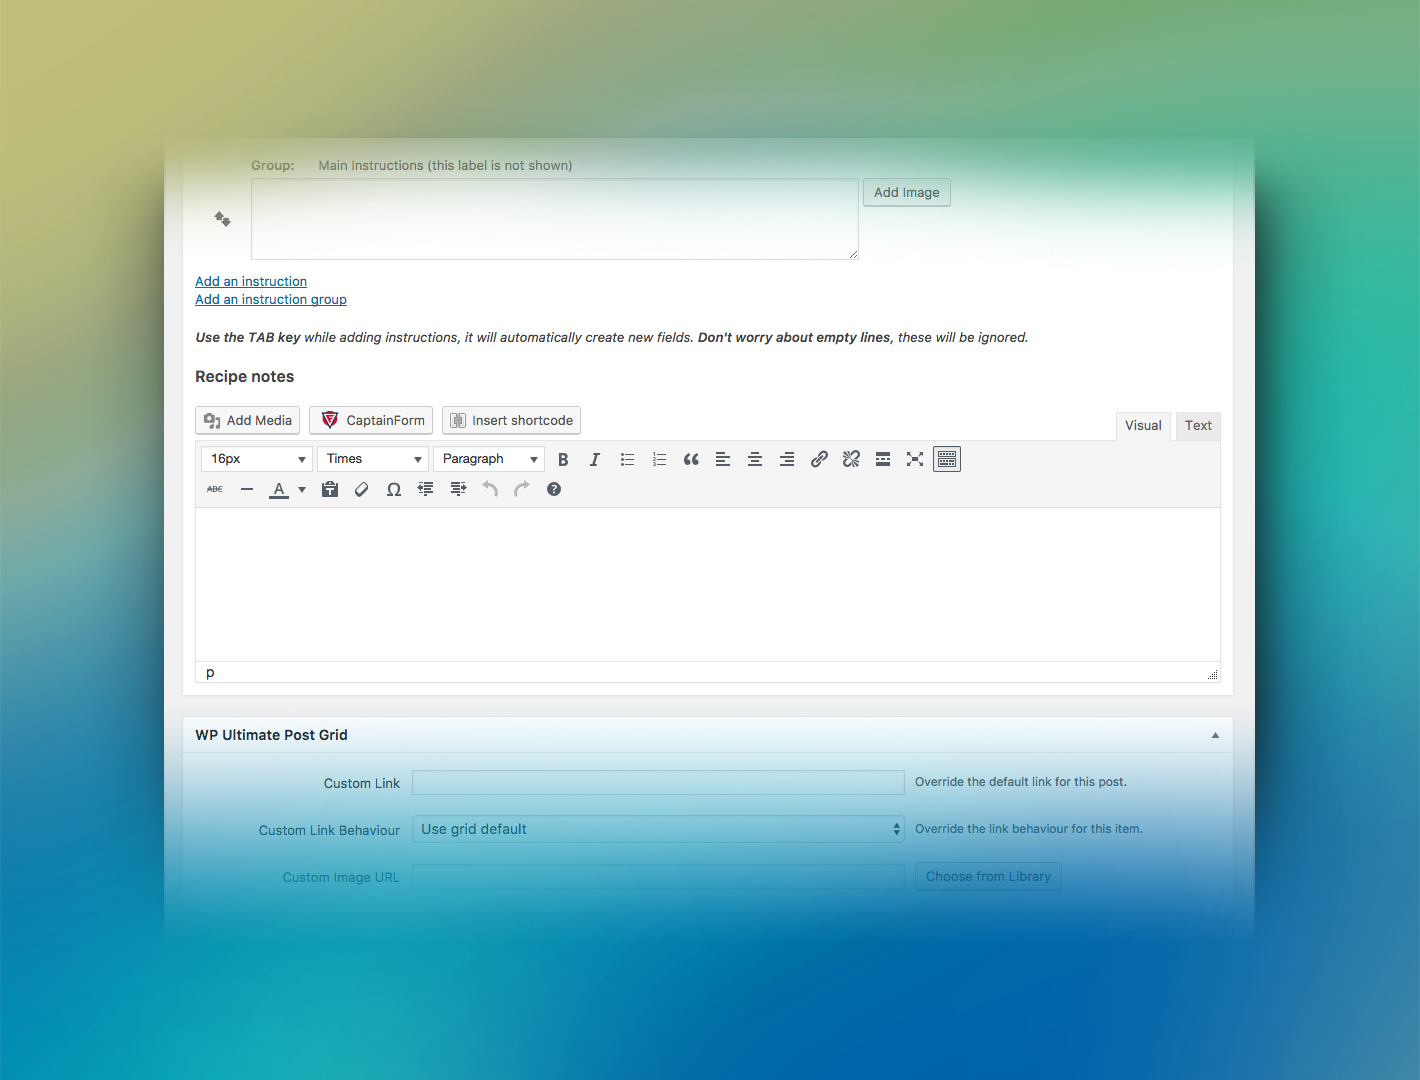
- RECIPE NOTES.
Finally, you can create here some notes and observations that don’t fit in any other field.