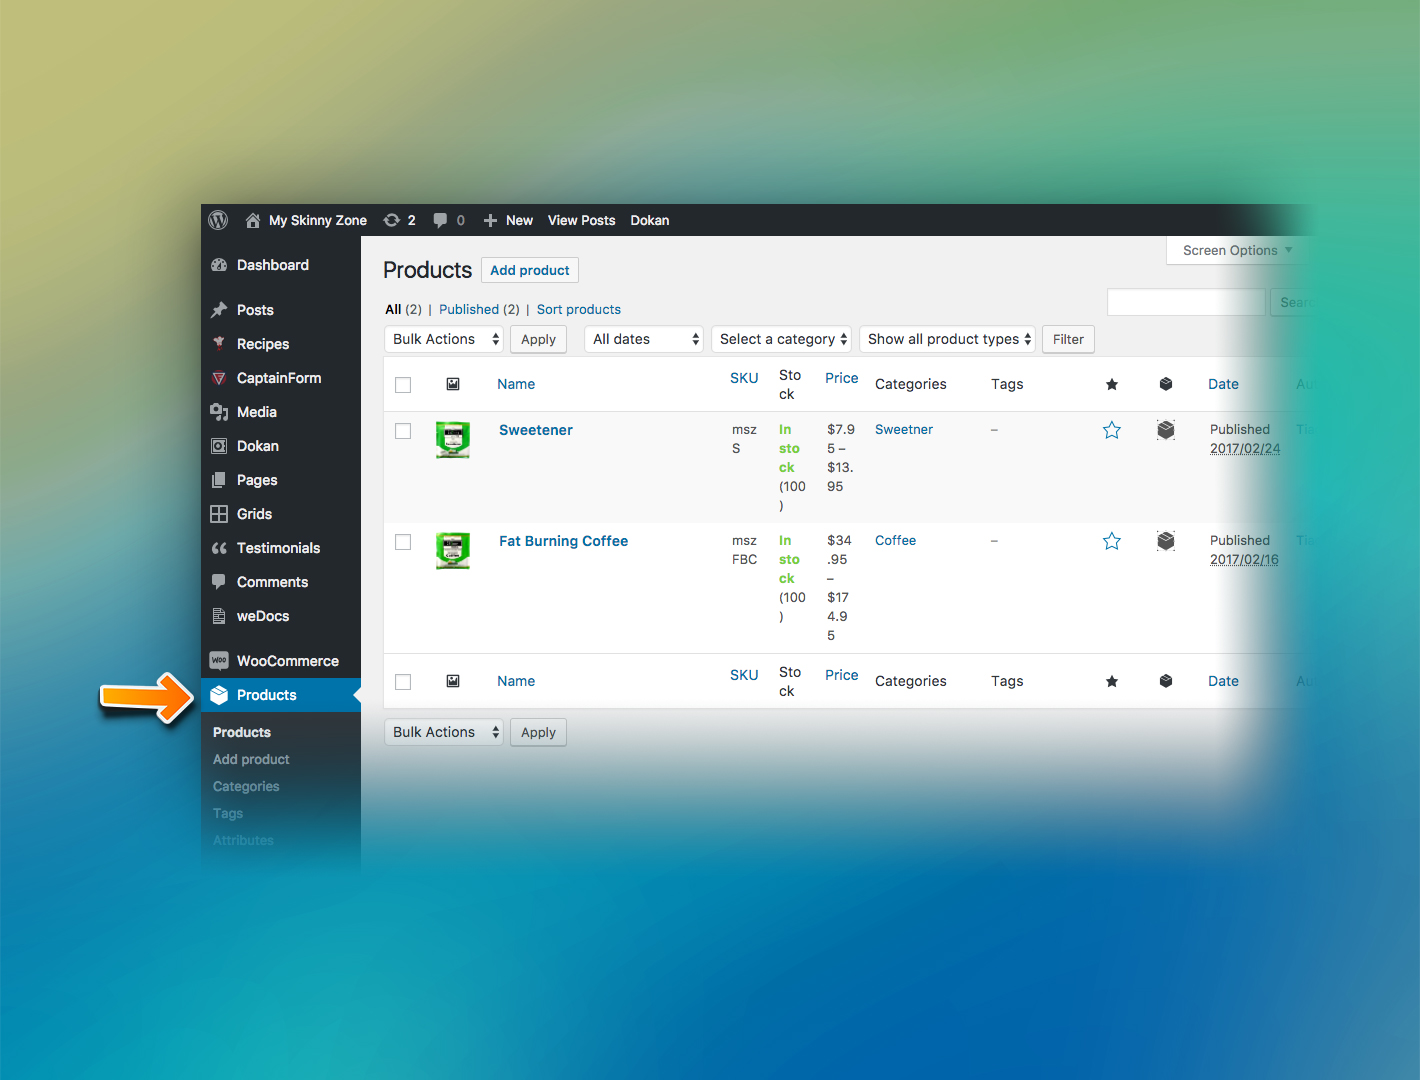
The first thing to do to configure your store is inset the products.
In this step is very important you fill all the information about your products so the visitors and the search engines can find your store easily.
Adding products
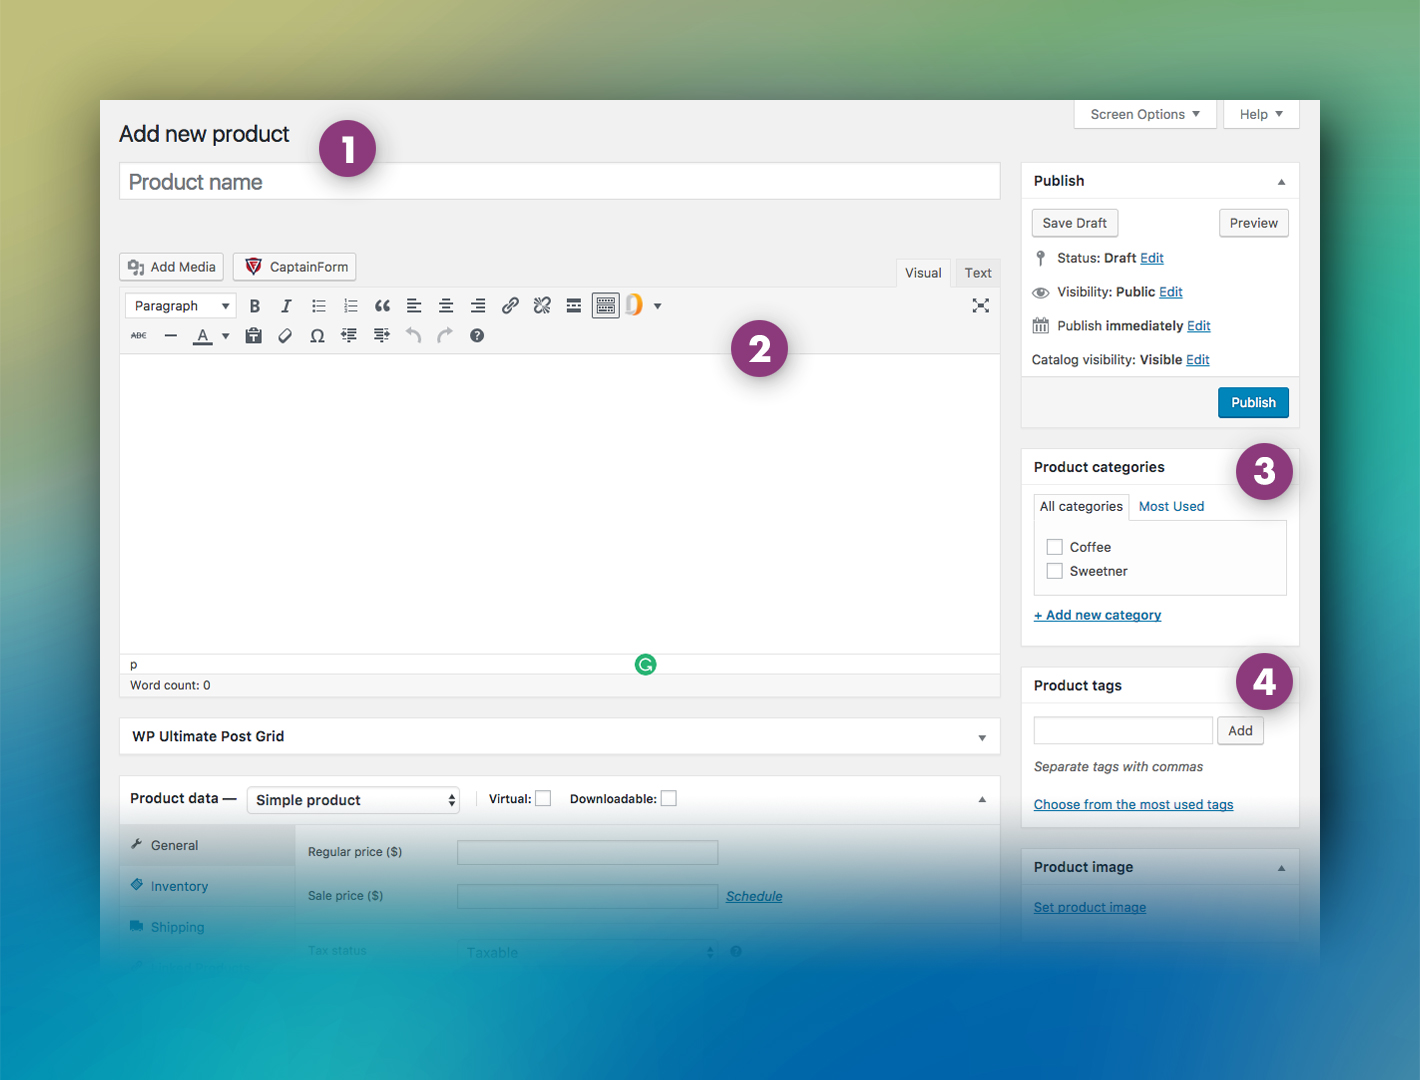
- 1 – Name of the product.
Here you put the name of the product.
Avoid putting description within the name. Keep it simple and direct.
- 2 – Full description.
This is the text your clients will see when clicking on the product.
Be sure to make a detailed description to clarify most of the questions your clients could have.
- 3 – Categories.
Here you have a list of categories pre-created. To learn how to create a new category, check the section CATEGORIES on this docs.
Categories are used to organize/filter your store.
You can filter your product by the utility, by the type of use, by the ingredients category and so on.
Make sure to create intuitive names for the categories and to put the right product in the right category.
- 4 – TAGs.
The TAGs here works the same way as in articles.
Are useful to categorize the products and its an efficient filter for your customers.
Also, depends on the configuration of your store, the system can check the TAGs related with the current product and recommend other products with the same TAGs.
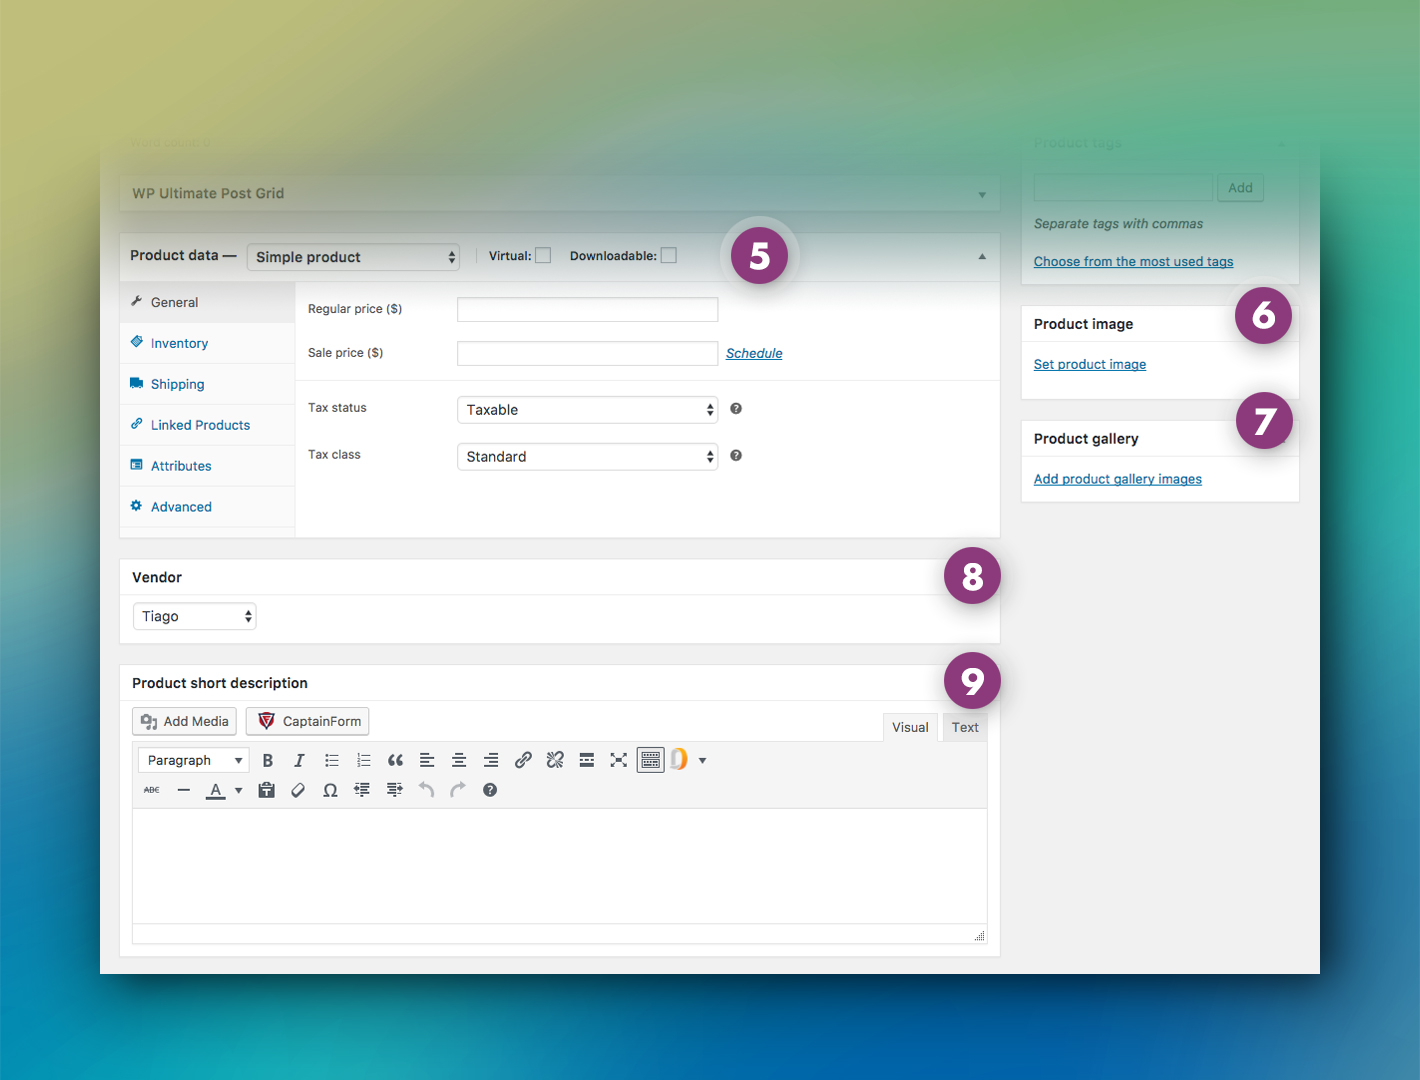
- 5 – Product data.
The product data is a very sensitive information.
This is all the information about the characteristics/quantity/package/price/numbers of your product.
To a detailed explanation, check the section bellow Product data.
- 6 – Product image.
This is the main product image, so be sure to use a very good image with high quality.
- 7 – Product gallery.
Is possible to add a gallery with multiple images to show better your products.
If you want to use a gallery, be sure to have images with differents angles to show the details of your product.
- 8 – Here you can choose the format/style of your article.
This option indicates who is selling the product.
If the product has some fee, usually this fee goes to the vendor, so make sure the right vendor is selected.
Product data
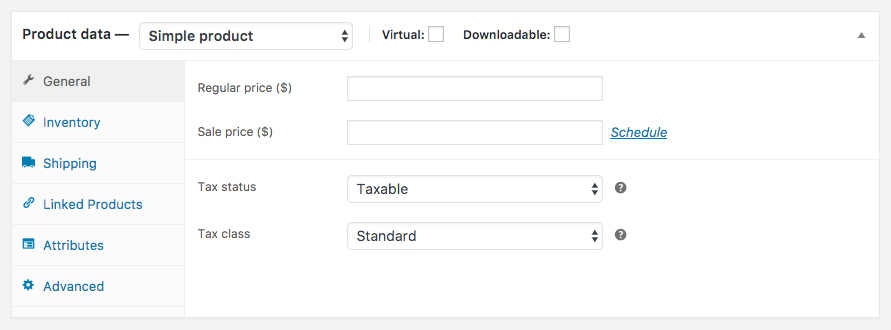
GENERAL – this tab is used to specify the basic info about the product. Here you can set the price/promotion (schedule) and taxes.
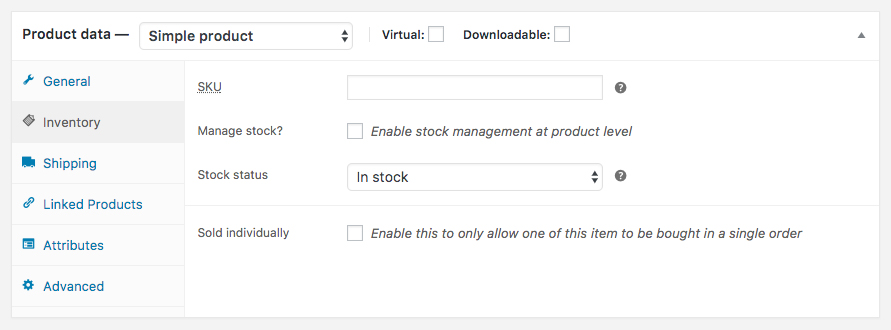
INVENTORY – use this tab to set up the info related to the product and the stock. Is possible to set an ID/number (SKU), enable the direct stock management/status and the limitation of the purchase.
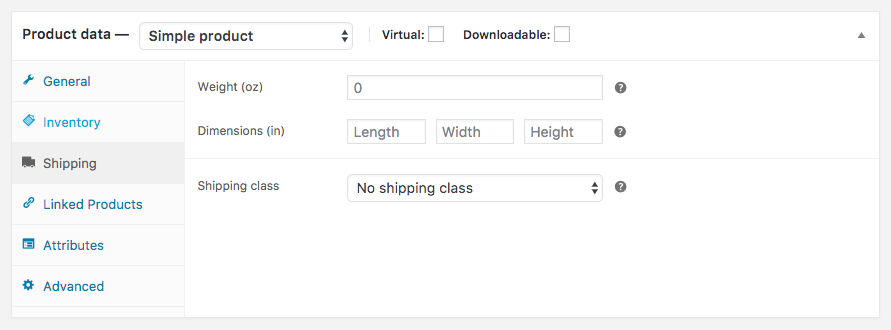
SHIPPING – this option is used to control the specs related to the physical size and weight. Also is possible to set the shipping class, used to group similar items to the same shipping.
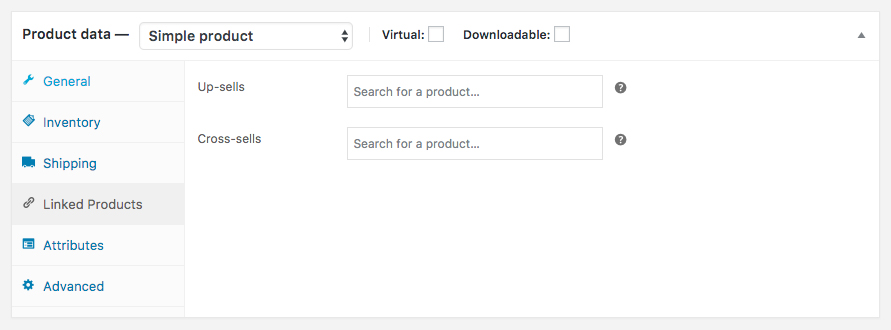
LINKED PRODUCTS – this option is used to suggest/recommend other products while your customer is viewing a single product. Very useful when the recommendation is another product that complements the current one.
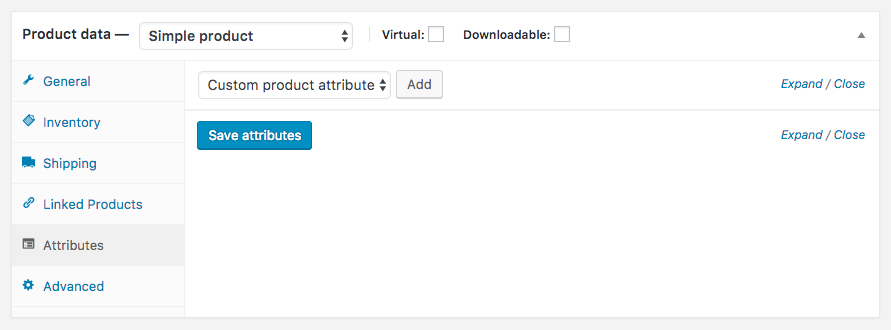
ATTRIBUTES – used to create new attributes to use/help on the product description. Useful in some cases when you are selling very specific products and want to show determined characteristics in common for all your products. For example, you can create the characteristic male/female depends on the product.
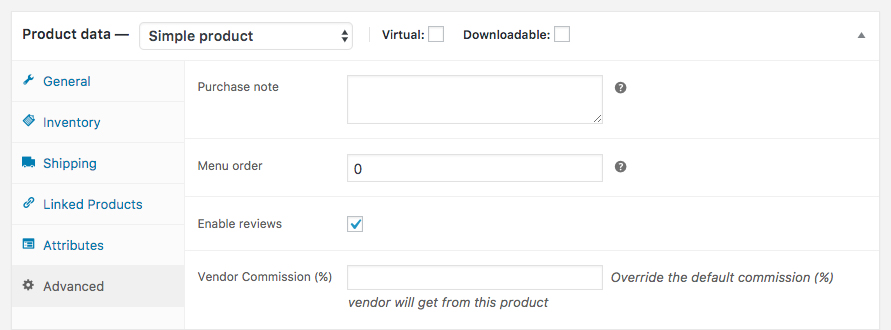
ADVANCED – here you set specific rules and attributes for each product. For example, if you want to show a specific message after the purchasing or if you want a different commission percentage.